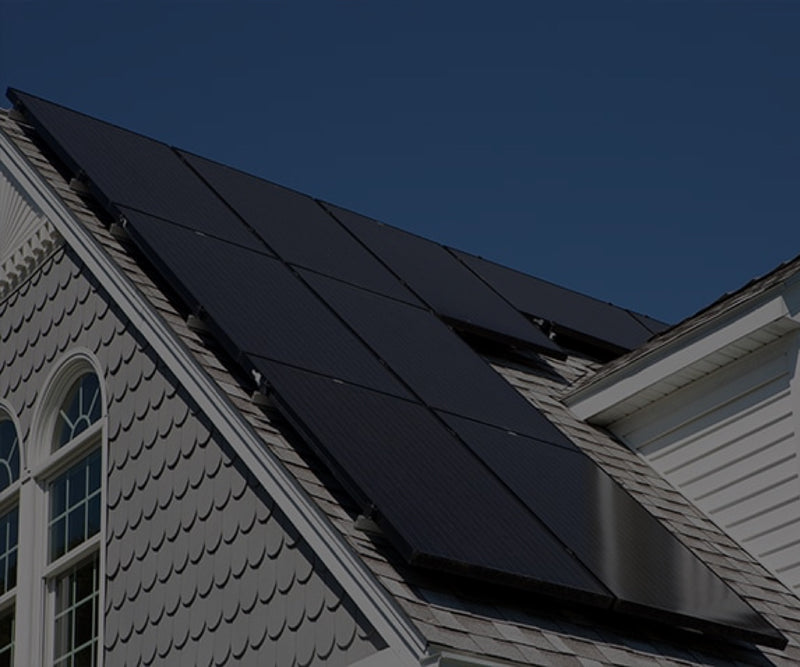
IronRidge Racking - Roof Mount
Overview

IronRidge builds the strongest roof mounting system in solar. Every component has been tested to the limit and proven in extreme environments.
Their rigorous approach has led to unique structural features, such as curved rails and reinforced flashings, and is also why their products are fully certified, code compliant and backed by a 20-year warranty.
Features

Clamps
Grounding Mid Clamps simultaneously fasten and ground solar panels. Each clamp bonds with the module frame and the rail to form a parallel grounding paths that is repeated throughout the array.
Rails
XR Rails are the backbone of the solar array. Their unique curved profile increases structural strength and spanning capability, allowing for fewer roof penetrations and more cost-effective system designs.
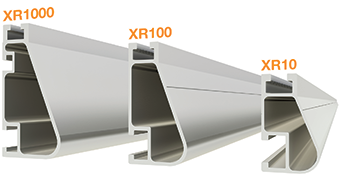
XR Rails
XR Rails are the backbone of the solar array. Their unique curved profile increases structural strength and spanning capability, allowing for fewer roof penetrations and more cost-effective system designs.
XR Rails are available in three targeted sizes: XR10, XR100 & XR1000. Each size supports specific design loads, while minimizing material costs. Depending on your location, there is an XR Rail to match.
Watch the Video
Read the Tech Brief

Find out the spanning capabilities in different wind and snow conditions for each of Ironridge's new rails
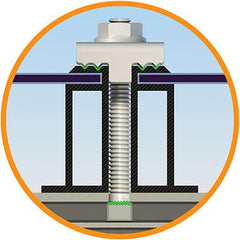
Download »Integrated Grounding
The IronRidge Integrated Grounding System bonds solar module frames directly to XR Rails, eliminating the need for separate module grounding parts and procedures.
At the heart of the new system is the Grounding Mid Clamp, which uses “teeth” to pierce through the anodized coatings of both the module frame and the XR Rail. This forms a secure electrical bond that is repeated throughout the array.
Watch the Video
Read the Tech Brief
 Ironridge's Integrated Grounding system includes a grounding mid clamp, grounding strap and grounding lug. Find out more in this short PDF.
Additional Parts
 |
 |
 |
 |
StandoffsRaise flush or tilted systems to various heights. |
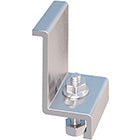
Slotted L-FeetDrop-in design for rapid rail attachment. |
Tilt-LegsTilt assembly to desired angle, up to 45 degrees. |
Adjustable Tilt LegsFixed and adjustable tilt legs allow adjustment in all three axes. |
|
|
|||
 |
 |
 |
 |
End ClampsSlide in clamps and secure modules at ends of rails. |
T-Bolt LugA single Grounding Lug connects an entire row of PV modules to the grounding conductor |
End CapsProvide a finished look for rails. |
Wire ClipsOrganize both DC and AC wiring along the rails. |
Attachments
 |
 |
 |
|---|---|---|
|
Quickhooks Recommended for flat or curved tile roofs. |
S-5 Recommended for all metal roofs. |
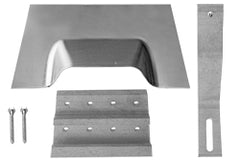
IronRidge FlashFoot 2 Recommended for composite shingle roofs. |
Training & Help
GoGreenSolar.com is a direct distributor of IronRidge parts and components. View our complete line of DIY solar kits that include IronRidge racking.
We're experienced solar veterans, providing custom solar solutions since 2006. Our work has been featured on CBS, Price is Right, and USA Today. Choose us for a boutique, complete service experience - we help you every step of the way until you're generating free energy from the sun.
Solar Calculator
Which Solar Kit Do I Need?
GET STARTED WITH SOLAR
WE’LL HELP YOU FIGURE OUT YOUR SOLAR NEEDS!
Fill out the form for a complimentary solar quote that includes a custom satellite layout, system design and a breakdown of total project cost and estimated savings.